


You’ve done your research, crunched the numbers, and now you’re standing at the edge of a big decision: DIY installing a fibreglass pool. You can already picture the satisfaction of seeing it all come together, knowing you saved a huge chunk of money by going the DIY route. But let’s be real—there’s that little voice in the back of your mind, whispering doubts. What if something goes pear-shaped? What if you miss a step and end up with costly repairs down the line?
It’s completely normal to feel a mix of excitement and anxiety when taking on a project of this scale. We’ve been there ourselves, and we know exactly what it’s like to wonder if you’re truly up for the challenge. The good news? With the right guidance, “how-to” videos, and supporting documents, you can pull this off like a true blue DIY legend. In this guide, we’re here to walk you through each step, sharing tips and insights that will help you install your pool with confidence and precision.
How to Install a DIY Fibreglass Pool:
- Get Council Approval: Check with your local council and secure necessary permits.
- Mark Out Your Pool Area: Measure and mark the pool’s location.
- Excavate the Site: Follow the dig sheet for precise measurements.
- Prepare the Base: Use crusher dust or aggregate for a level foundation.
- Place the Pool Shell: Use a crane and check alignment.
- Connect Plumbing: Install pipes and perform a pressure test.
- Backfill Gradually: Use cement-stabilised crusher dust while filling the pool.
- Lay the Bond Beam: Reinforce the coping beam with concrete.
- First Clean: Remove dirt and debris from your pool and chemically balance the water.
- Fencing: Install permanent pool fencing.
- Final Checks: Ensure compliance and arrange a final inspection

Planning and Preparation: Setting the Stage for Success
Before you even think about grabbing a shovel, it’s crucial to get the planning phase right. Proper planning can mean the difference between a smooth installation and a project full of headaches.
Council Approval and Permits
First things first—make sure to check with your local council about any permits or approvals you need. All councils require plans for pool installations. Getting this sorted early on will keep your project on track and save you from potential delays down the road.
Marking Out Your Pool Area
Use a builder’s string line (cheap as chips from your local hardware store) to mark out where your pool will sit. This simple but effective method helps you visualise the space, ensuring it fits well within your property boundaries while leaving room for poolside landscaping or fencing.
Is your backyard "cosy"? A DIY plunge pool might be right for you: Tips for Building a DIY Fibreglass Plunge Pool on a Budget
Access for Equipment
Think about how excavation and delivery vehicles will access the site. You’ll need at least 900mm of clearance for excavation equipment. If possible, more space—like 3m or more—is even better, especially if you're using larger machinery. Narrower access might mean using smaller equipment, which can add time and cost to your project. But don’t worry, this is only a headache if you don’t plan for it in advance.
Excavation Done Right: Tips to Avoid Common Pitfalls
With your planning done, it’s time to break ground. Get this stage right, and you’ll be well on your way to a smooth installation.
Understanding Soil Types
Different soil types require different approaches to excavation, earth removal, and the bedding layer. A soil test might set you back a few hundred bucks, but it’s worth every penny. Clay soil, for example, requires a wider and deeper excavation compared to sandy soil. Soil with a lot of rock will add to the cost of excavation and the amount of time required. Your wallet will be stoked you knew your soil type well before excavation starts.
Digging to the Correct Dimensions
Stick to the dig sheet like your project depends on it—because it does! Use a hired laser level to ensure you excavate to the correct depth and width. If you over-excavate, you’ll pay for the extra soil removal and additional backfill, and you might even need to install piers. Double-check your measurements as you go. As the good 'ol Aussie carpenter's maxim goes, “measure twice, cut once.”
Managing Soil Removal
Removing soil is often an afterthought, but planning how you’ll dispose of it can save you a good chunk of cash. Look for local fill removal sites that might take your soil for free, or consider reusing some of the soil for landscaping. Keeping your worksite tidy will make the whole process easier and safer.
Base Preparation: Laying the Foundation for a Level Pool
A level base that follows the contour of your pool is key to a flawless pool installation. Getting this part right ensures you won’t need to lift the pool out and re-level the bedding.
Choosing the Right Bedding Material
Crusher dust or aggregate (no larger than 7mm) is compliant with Australian Standards (AS1839: Installing a Fibreglass Pool) and is commonly used. 7mm stone can be a little more forgiving to work with, but crusher dust is equally popular among installers around Australia.
Watch Our Video on: The Bedding and Backfill Material To Use When Installing A Fibreglass Pool
Levelling the Base
Use a long spirit level or a laser level to ensure the base is perfectly flat and even. If you’re unsure, it’s better to leave your base slightly low; you can lift the pool during backfilling. If your base is too high, the only option is to lift the pool out and re-level. Take your time with this step—rushing it can throw off your entire schedule.
Need a demonstration? Watch now: How To Backfill and Level a Fibreglass Pool In Australia
Avoiding Common Mistakes
One of the biggest mistakes is compacting the base material. Unlike a concrete slab, the bedding layer for a fibreglass pool doesn’t need to be compacted. This allows the pool shell to settle naturally during installation.Pool Shell Placement: Getting It Right the First Time
Now comes the exciting part—placing the pool shell into the prepared excavation.
Using a Crane or Lifting Equipment
Depending on your site, you might need a larger crane to lift the pool shell into position, especially if access restrictions or overhead obstacles exist. If you’re concerned about access, send photos to your crane company. If access is good, a low-cost Franna crane can lift your pool into place. To avoid any mishaps, make sure the crane operator has plenty of prior experience handling fibreglass pools.Alignment and Levelling
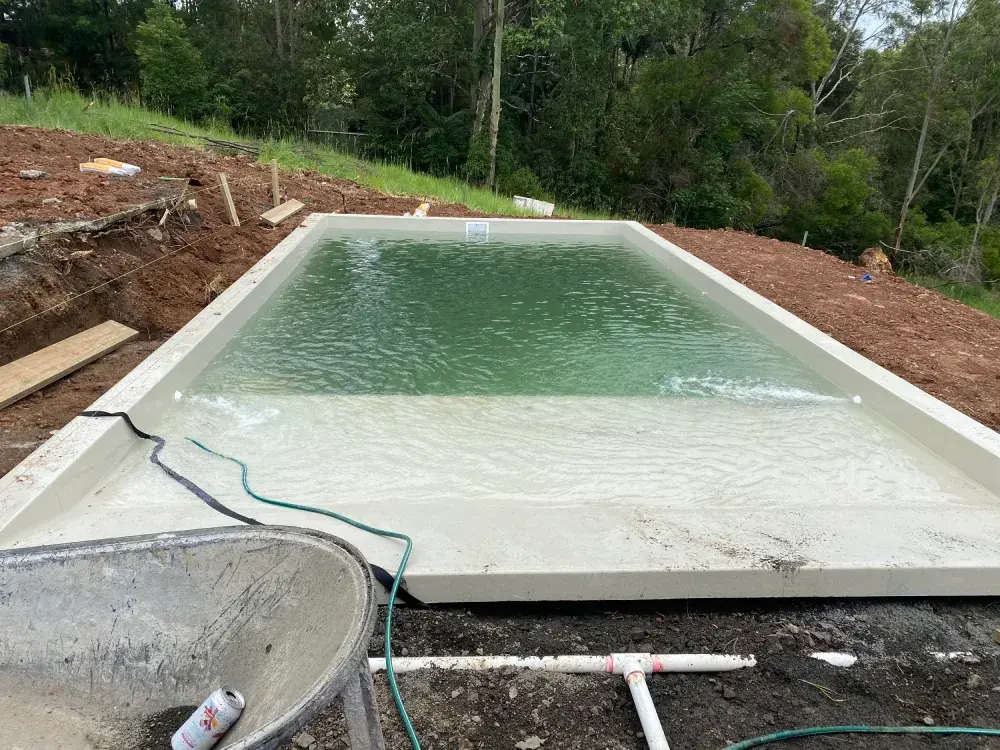
Once you start filling your pool with water, continually measure the height of your pool at each corner and along the long sides and adjust as needed.The Importance of Slow Filling
Filling your pool with a water cart can save time, but it might rush the backfilling stage. A water cart can fill a 40,000-litre pool in less than an hour. Instead, use your garden hose to fill the pool in 300mm increments, backfilling to the waterline each time. This slower method allows you to level the pool and keep your pool walls straight without feeling rushed.Plumbing and Connections: Doing It Like the Pros
With the pool shell in place, it’s time to get the plumbing sorted.
Running the Pipes
Plan out your plumbing runs in advance. Keep the pipes as straight as possible, using 45-degree bends instead of sharp 90-degree angles to maintain good water flow. Secure the pipes using the coping beam as an anchor point, preventing your pipes from cracking due to the downward pressure of the backfill.Pressure Testing
Before you start backfilling, perform a pressure test on all plumbing connections. This simple step can save you from future leaks by allowing you to identify and fix any issues before they become costly repairs.

Backfilling and Stabilisation: Ensuring Long-Term Stability
Backfilling is more than just filling in the gap around your pool—it’s a critical process that locks the pool shell in place and ensures it remains stable for years to come.
Cement-Stabilised Crusher Dust
To comply with Australian Standards, you must use cement-stabilised backfill material. This mixture provides both stability and drainage, helping to prevent erosion or movement over time.Simultaneous Filling and Backfilling
As mentioned earlier, filling and backfilling should happen together. As you go, keep the water level slightly above the backfill level to maintain even pressure on the pool walls.
Learn more with our video: Timelapse Fibreglass Pool Installation
Avoiding Pool Shell Shifting
Regularly check that the pool remains level as you backfill. Before there’s too much water weight in the pool, you can adjust the pool shell without damaging it.Concrete Bond Beam and Coping: Securing the Pool’s Edge
A structurally sound bond beam is essential to secure the pool’s position and to support your coping tiles. Here’s how to get it right.
Laying the Bond Beam
Once the pool is in place, box up the bond beam area to the dimensions of your first row of pavers or tiles. These are often called “coping tiles” or “coping pavers.” i.e. if your pavers are 400mm long, your concrete bond beam will be 400mm wide.
Need a demonstration? Watch now: How To Build The Bond Beam
Choosing and Installing Coping Tiles
Pick durable, non-slip tiles that suit your style and can handle Australian weather conditions. Properly installing these tiles involves ensuring they’re level and well-secured to the bond beam for a polished, professional finish. Allow the pool to settle for at least a week before installing the bond beam. This will prevent potential future movement and tile cracking.Final Checks and Finishing Touches: Before You Dive In
You’re almost there! Before you land your first bombie, take some time to double-check everything and add those final touches.
Ensuring Compliance
Make sure your permanent pool fence meets all Australian safety standards and that your equipment is installed according to the manufacturer’s instructions. This isn’t just about avoiding fines—it’s about keeping your family and guests safe.Water Balancing and Cleaning
Give your pool a thorough clean to remove any construction debris. Then head to your pool shop for a free water test. They’ll tell you what you need to balance your water and how to go about it.Landscaping and Aesthetics
Whether you choose lush greenery, stylish paving, or a minimalist look, well-planned landscaping will transform your pool area into the ultimate relaxation spot. Think about leaves, flowers, and berries dropping onto your pavers or into the pool. They might look great on the plant, but constantly cleaning your pool area and pool can be a real pain in the backside.Installing a fibreglass pool yourself might seem daunting at first, but when done right, it’s a truly satisfying achievement. Not only will you save a significant amount of money, but you’ll also enjoy the deep satisfaction that comes from accomplishing something truly impressive.
Approach each step with care, knowing that preparation is the key to success. Don’t rush—getting everything just right will prove beneficial over time. And remember, we’re here to support you 7 days a week. Whether you’re looking for more detailed guidance or need a bit of extra reassurance, don’t hesitate to reach out. We’re committed to helping you every step of the way, ensuring your pool installation is smooth, successful, and something you’ll be proud of for years to come.
Additional Resources
- The Essentials You Must Know Before Buying a Pool
- DIY Pool Installation Stages - Including photos and dives a lot deeper into the ins and outs of it all.
Happy pool building!


